4 August 2014 by Remco Bouckaert
Say, you have some post-processing classes written for your package and you want to make it available to users. Since the class is in your package, say mypackage.addon.jar and most likely you need classes from BEAST-core or other packages, it is a nuisance to set the class path from the command line. You’ll and up having to do something like
java -cp /path/to/beast/lib/beast.jar:~/.beast/2.1/MyPackage/lib/mypackage.addon.jar beast.app.tools.MyTool arg1 arg2 arg3
This is especially cumbersome to explain to users since these paths depend on where BEAST is installed and where packages are installed. These paths are operating system dependent. One solution to this is to use the BEAST AppStore. This is an application that comes with BEAST. It picks up information from the version.xml file. You specify an addonapp element with a description, class, default arguments and an icon. For example, the model-selection package contains an application to run a path sampling analysis, which is encoded like so:
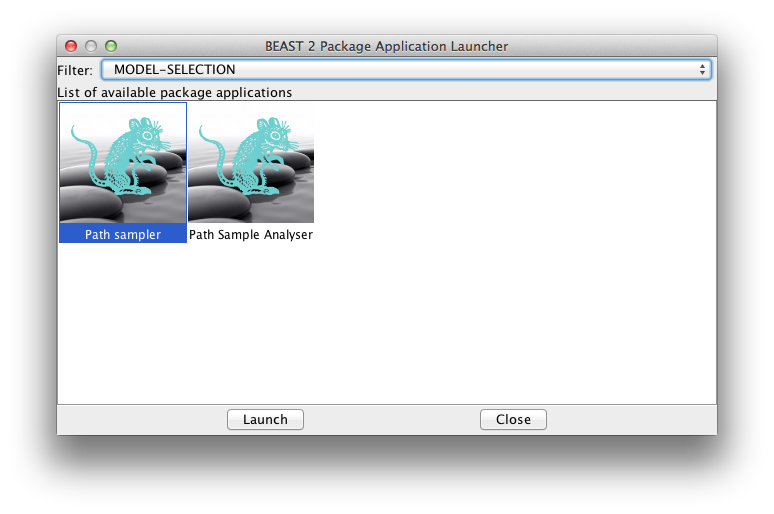
When you start the AppStore, it will look like this:
If you launch it from the AppStore, you probably want to launch it as a GUI, since Windows and Mac users won’t be able to see any terminal input otherwise. You can write your own GUI in Swing or JavaFX if you like, but there are a few helper classes that make it very easy to write GUI applications with BEAST. The recipe is as follows:
- Create a class for your App that derives from beast.core.Runnable.
- Specify Inputs for each of the arguments for your application.
- Implement the run() method to pick up values from inputs and run your app.
- Create a class to launch the App.
- Update the version.xml file
Path sample analyser application
Step 1: create class for App
Step 1: create class for App
The path sample analyser lives in the class beast.inference.PathSampleAnalyser and derives from beast.core.Runnable.
@Description("Reads logs produces through PathSampler and estimates marginal likelihood")
public class PathSampleAnalyser extends beast.core.Runnable {
}
Step 2: specify inputs
For the path sample analyser, we need a root directory, alpha, number of steps and burnin as a percentage. So, we add the following Inputs to the class.
public InputrootDirInput = new Input ("rootdir", "root directory for storing particle states and log files (default /tmp)", "/tmp"); public Input alphaInput = new Input ("alpha", "alpha parameter of Beta(alpha,1) distribution used to space out steps, default 0.3" + "If alpha <= 0, uniform intervals are used.", 0.3); public Input stepsInput = new Input ("nrOfSteps", "the number of steps to use, default 8", 8); public Input burnInPercentageInput = new Input ("burnInPercentage", "burn-In Percentage used for analysing log files", 50);
Step 3: implement run() method
The actual post-processing happens in the method estimateMarginalLikelihood. The run method just gather info from the inputs and passes it to that worker method.
@Override
public void run() throws Exception {
    // do the work
    double marginalL = estimateMarginalLikelihood(
			stepsInput.get(),
			alphaInput.get(),
			rootDirInput.get(),
			burnInPercentageInput.get());

	// report the result
	System.out.println("marginal L estimate = " + marginalL);
}
Step 4: Create launcher class
Create a class to launch the App. This is the class that you register in the version.xml file. The following bit of code can be used as a template for your own app — just replace the class for the analyser variable and update name and title. It uses two utility classes beast.app.util.Application and beast.app.util.ConsoleApp (currently in the model-selection package, but it should probably move somewhere else). You can also suppress inputs that you do not want to expose to the user.
package beast.app.tools;

import beast.app.beauti.BeautiConfig;
import beast.app.beauti.BeautiDoc;
import beast.app.draw.BEASTObjectDialog;
import beast.app.draw.BEASTObjectPanel;
import beast.app.util.Application;
import beast.app.util.ConsoleApp;

//command line interface to PathSampleAnalyser
public class PathSampleAnalyser {

	public static void main(final String[] args) throws Exception {
		Application main = null;
		try {
			// create the runnable class with application that we want to launch
			beast.inference.PathSampleAnalyser analyser = new beast.inference.PathSampleAnalyser();

			// need to set the ID of the BEAST-object
			analyser.setID("PathSampleAnalyser");

			// then initialise
			analyser.initAndValidate();

			// create BeautiDoc and beauti configuration
			BeautiDoc doc = new BeautiDoc();
			doc.beautiConfig = new BeautiConfig();
			doc.beautiConfig.initAndValidate();

			// This is how you suppress an input that we don't want to expose to the user
			// doc.beautiConfig.suppressPlugins.add(analyser.getClass().getName() + ".input-name");


			// create panel with entries for the application
			BEASTObjectPanel panel = new BEASTObjectPanel(analyser, analyser.getClass(), doc);

			// wrap panel in a dialog
			BEASTObjectDialog dialog = new BEASTObjectDialog(panel, null);
			if (dialog.showDialog()) {
				dialog.accept(analyser, doc);
				analyser.initAndValidate();

				// create a console to show standard error and standard output
				analyser.consoleApp = new ConsoleApp("PathSampleAnalyser", // name
						"Path Sample Analyser: " + analyser.rootDirInput.get() // console title
						);

				analyser.run();
			}
		} catch (Exception e) {
			System.out.println(e.getMessage());
			if (main != null) {
				System.out.println(main.getUsage());
			}
		}
	}

}
Update the version.xml file
Add an addonapp element to the version.xml file, so the AppStore can pick it up.
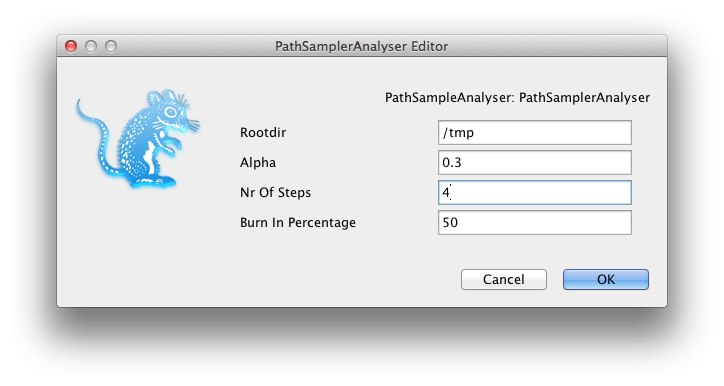
When launching the PathSampleAnalyser from the AppStore, it looks like this: